I love a good cup of Joe. Most Americans and indeed, many around the world enjoy the bitter, black brew. There are several methods of preparation originating from Europe as well as the Middle East, making coffee a truly native experience wherever enjoyed. Some styles produce highly intense shots, or are creamy mixtures of milk and Java or in the case of Turkish Coffee, pure awesome. However, the spread of the coffee house and the professional barista has made many alternative preparations common wherever one finds themselves. This is a stroke of luck since in the United States coffee has been, until recently, of the drip-brew variety. This method is notorious for producing "sludge," a black and viscous fluid thickened by time and constant heat.
However, there is one style of coffee that is rarely made at home, and rarely made correctly: Iced Coffee. This is a perennial favorite of the coffee house enthusiast during the hot summer and in some southwestern states, a necessity. Why a necessity? I live in Phoenix, AZ where at 8AM on a june morning it is 90 degrees Fahrenheit, 32 degrees Celsius. I don't care how good that tall black is, I am not drinking anything without ice.
But how does one make iced coffee. Surely its just taking a hot cup and combining it with ice and milk? If this was your first thought then you are wrong, my friend. Combining hot coffee and ice creates a bitter taste profile often leading to over-sugaring and an iced coffee that is more milkshake than coffee, at best. See Starbuck's as purveyor's of this abomination. At worst, this mistake leads to a weak and watered down coffee that barely has any ice. Essentially, coffee-tinted water. Gross. So how do we do it? Or rather, how do we do it ON THE CHEAP?
Tutorial Starts Here:
Rather than creating a hot brew coffee we will be making cold-brew coffee. This process is simple but does require time rather than heat. The cheapest method to make cold-brew coffee is using mason jars and filter paper but a cleaner and more flexible system is using a french press. Using a french press allows one to cold-brew and hot-brew coffee on a whim. So you will need the following (brew time is 12 hours):
 |
| A french press This is a Starbuck/Bodum Black Crema 4 Cup French Press. |
 |
| A wooden or plastic spoon. Note: A metal spoon can and will break a glass carafe. Just stick with wood or plastic to stir anything inside a glass press. |
 |
| Bean Measure (1/2 cup) |
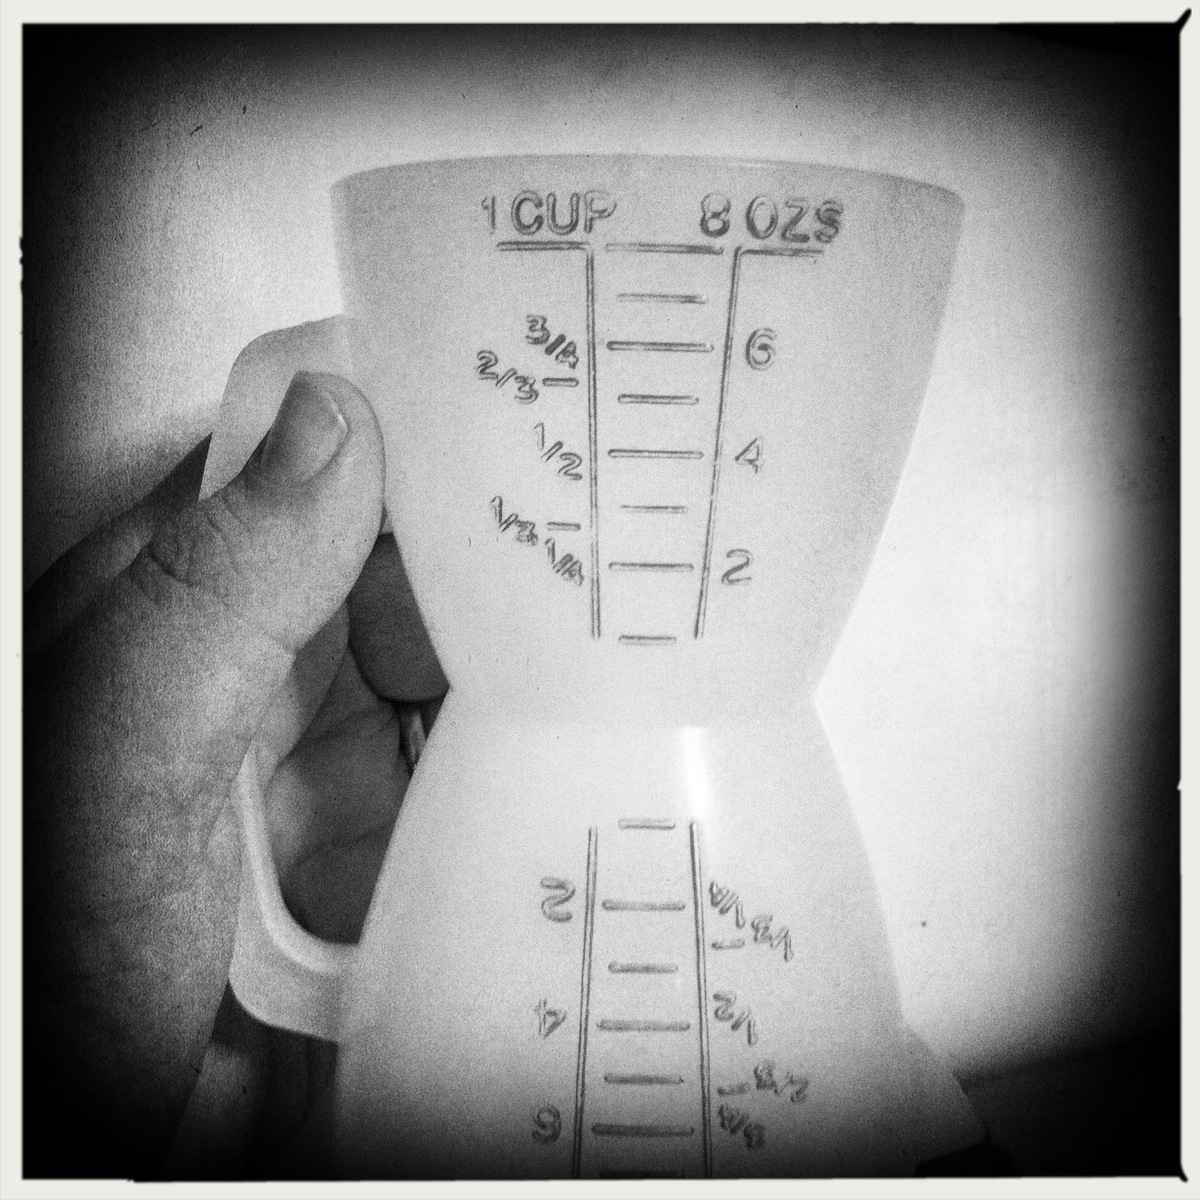 |
| Grounds Measure (1 cup) |
Note: You need to keep your grounds separate from your whole beans if you are grinding at home. I usually just put them from the grinder to the press, but if you want to be exacting, by all means monitor beans and ground amounts. |
| Grinder if you are grinding your own beans. This is a Krups Fast Touch. It is a blade grinder that works well for small, personal servings of coffee. For larger amounts of home ground coffee, use a burr grinder. |
 | ||
| Some beans or fresh grounds. These are Starbucks beans (this batch was prepared for company, I keep the good stuff for myself!) but I recommend Just Coffee Co-operative Coffee. Support Fair Trade!
|

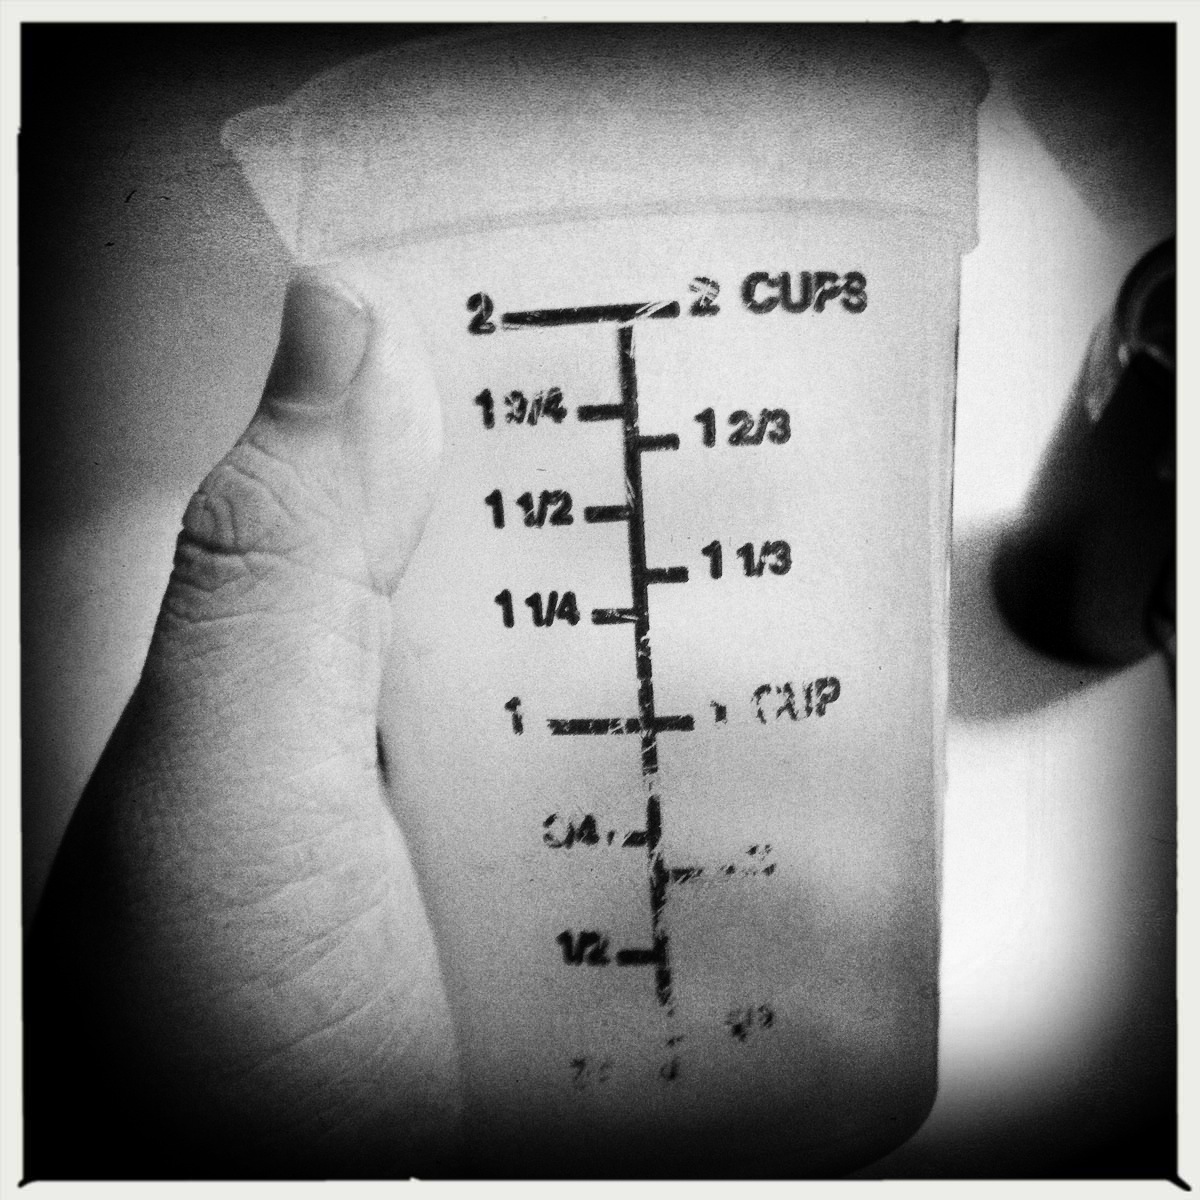 |
| Water Measure (2 cups) |

Step 1: Grind your beans! Cold Brewing requires a lot grounds! The ratio is 2-to-1, water to coffee. For two cups of water, one cup of grounds is needed. Using a small grinder like the Fast Touch means you are grinding in 1/2 cup increments.

Note: Grounds must be coarse! After grinding, it should look like the surface of Mars, some big chunks but no boulders (whole beans).
 |
| 1 cup of beans is 1 cup of grounds... obviously. |
 |
| Measure out your 2 cups of water. |
 |
| Coffee Slurry Step 2: Add the grounds to the french press then add the water in a gentle pour going in a circular pattern. After pouring in the water, you will be stirring the mixture for 45 seconds. The grounds must be soaked thoroughly! |
 |
| Lidded for the time being... Lid the slurry, making sure the press is up! Let it sit for four hours on the counter-top... |
 |
| At the four hour mark. Step 3: After four hours lift the lid and stir for 30 seconds. The grounds should settle into the water and, if the beans are fresh, a foam should develop. This is CO2 being released, a bloom. Stale beans will release no gas. Cover with lid, press still up. Leave for eight hours. Step 4: At the twelve hour mark, push the press down in a smooth and even motion. Keep the stick straight and even, you don't want the grounds backwashing. Pour the coffee in to a storage container (glass or metal preferable.) This coffee is a concentrate and will stay usable in the refrigerator up to 14 days after brewing. When ready to drink, simply dilute with water/milk and add ice to taste. Go light on the sugar at first, cold-brew coffee is far less acidic and bitter than normal coffee. Don't forget to compost the grounds and that is it!... |
1 comment:
Impressive. I still think there needs to be a video version on the tutorials. "Cooking/Science with Ricardo..." where the master demonstrates the science behind coffee, perfect refried beans, and other yummi'oso dishes. Yummi'oso is mine, don't even try to steal it.
Post a Comment